


Today I'm so pleased to be featuring Christie from A Lemon Squeezy Home.
(Today's featured pattern after intro)
I found Christie through a guest post she wrote on another crafting blog. I was instantly impressed by her photography, style and ideas. Her belt tutorials are divine! See the Anthro knock-off below!


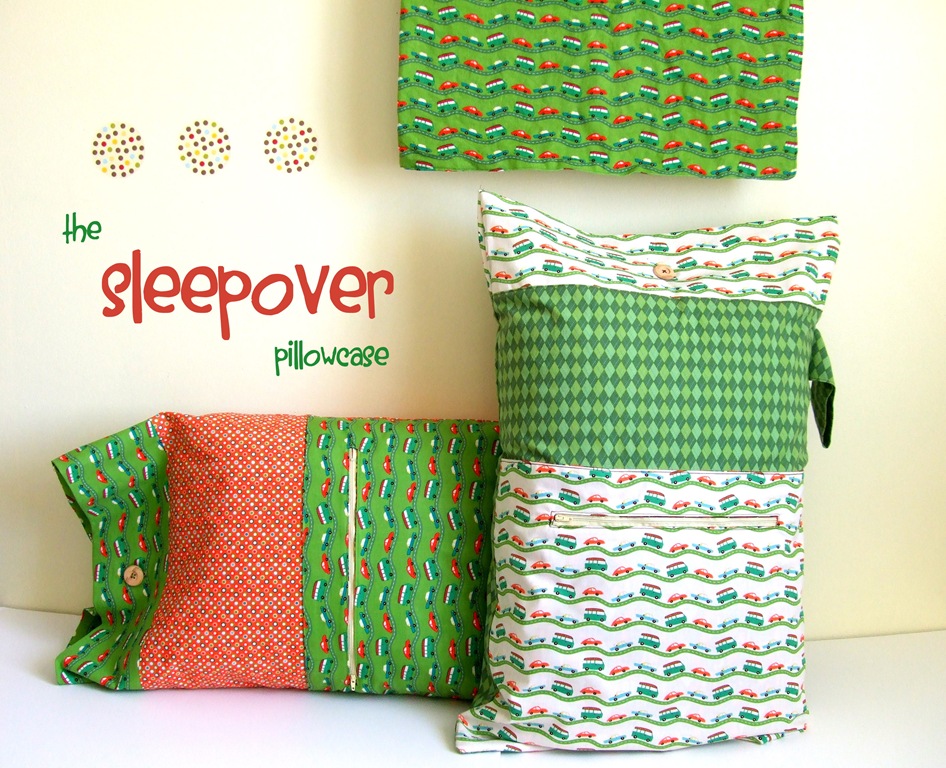
And this sleepover pillowcase with hidden zipper storage! Genius!

Or this cute tute below? Christie.....take it away!
~~~~~~~~~~~~~~~~~~~~~~~~~~~~~~~~~~~~~~~~~~~~~~~~~~~~~~~~~~~~~~~~~~~~~~~~~~
I am so honored to be on Grosgrain today! I think Kathleen is so sweet. She has such a unique and beautiful style! I love seeing her creations—she truly has honed her sewing skills into an art. I’m so glad she shares her talents with us all!
Today I’m going to show you how to make an alphabetized organizer for your loyalty cards. You could also store your business cards inside. My point and shoot camera also fits perfectly in it!

I saw something like this that was made with vinyl at a favorite quilt shop, but they were asking $18.00 for it! We all know the benefit of knowing how to sew, and how it can sometimes save us money. (That is, if we aren’t hoarding fabric!)
You’ll need:
10” x 11” piece of fabric
10” x 11” piece of coordinating fabric
10” x 11” piece of fusible featherweight interfacing (not the thinnest you can get, but not the thickest either—thick enough to hold some shape to the holder)
one magnetic snapcoordinating thread
Printed Pattern A and Pattern B, taped together where indicatedPrinted Alphabetizing Cards: 1, 2, 3, and 4 (optional)

Cut out one pattern from both fabrics and the interfacing. Also cut out one 1.5” x 1.5” square interfacing for the magnetic snap.

Iron the interfacing cut from the pattern onto the wrong side of the main outer fabric. Iron the small square of interfacing onto the wrong side of the lining fabric, at the top.

Take one of the rectangle “arms” of the pattern and line up perfectly on the edges, right sides together. Sew with a 1/4” seam.

Now line up the two edges that have a black line marking them, and sew those, right sides together.

So you’ll have a sort of box side now.

Repeat with the other “arm” on the outer fabric.

Now do the same thing to the lining fabric.

Next we’ll place the magnetic snap. Crease with your fingers a line marking the bottom of the holder.

Measure up about 3/4” of an inch, mark, and insert one side of the magnetic snap so it’s on the outside of the outer fabric. For more thorough directions on how to insert a magnetic snap, just google it and you’ll find all sorts of tutorials.

Insert the other half of the snap on the right side of the lining, leaving about 1” in order to be able to sew around the snap. You may want to adjust the snap placement to your liking, but keep in mind when placing both sides of the snap that you’ll want to place it so the edge of the snap is at least 3/4” from the top of the lining because you will be sewing around the snap, so adjust the spacing of the snap in order to have enough space to work around when sewing the lining flap. Tip: if you are having a hard time getting around the snap on the lining, try using your zipper foot.

Insert the outer fabric into the lining, right sides together as pictured below.

Pin around the flap and the edges of the holder. Leave about a 3” opening on the straight part (not pinned in the picture). Now sew around the edges, making sure to leave the 3” opening for turning.

I had to take off the U-shaped part of my machine to sew around the edges since it is small. And it looks a little crazy. Adjust often so you don’t sew a layer you aren’t supposed to. Make sure your needle is in the down position when adjusting so that your stitches remain even.

When you get to the corners of the flap, turn the holder a 90 degree angle to you have a nice, square corner stitch. I also backstitched a few times in the corners to reinforce.


Clip the corners and also the curve of the flap.


Pull the outer fabric through the 3” opening. Iron well, pin, and then topstitch around the edges, again reinforcing the corners with backstitching if desired. (next 3 pictures)


Cut the alphabetizing cards out, if desired, and place those many loyalty cards into your new holder. Finding one of those cards has never be easier!


Thank you Christie for joining me on Free Pattern Month! It was an honor to feature you!
Stay tuned tomorrow for Alli of One Pearl Button with her midi length skirt pattern!
Spread the word! It's a 30 day FREE for all!

Spread the word! It's a 30 day FREE for all!  | Spread the word! It's a 30 day FREE for all!  |


 Like not spending money?
47 {comments}:
Thanks for sharing, Christie! Nice project. :)
Love the project but the google docs links don't seem to be working!
@amoskin
Hi amoskin! They work for me, so maybe try again in a little while? Sometimes google docs is iffy:).
*love*
I've been keeping all mine in a pocket in my wallet and it just isn't working out so well. I think this might be my next sewing project... xoxo
This is such a cute idea Christie!! Your tutorial pictures are great too!
I was just thinking I needed something like this. Thanks!!
I love this little bag! Just what I need for my purse! Thanks! ♥♥♥
it's not working for me either?? I will try again later though. It says I don't have permission??
I get the message about not having permission to view the document. I'll keep trying. This is a great tute, I'd hate to miss out on it!
I am having trouble too. I'll try again in a bit. Looks like a great idea. Looking forward to trying it out.
lovely, thank you!
Eeek! I'm so sorry about that, everyone. I suppose the option on google docs "everyone with the link" doesn't work for some reason. They should work now. Let me know if it doesn't and I'll try and figure out why:).
It's working for me now:)
I am definitely link up to this! My readers will LOVE it!
oh
very bright blog
corporate catering Toronto
super cute!
Fun! I could for sure use one of these.
Christie ~ What a awesome tutorial. This is a great idea and would make awesome gifts too. Thank you so much
This is wonderful! I cannot wait till tomorrow to make it!
This is BRILLIANT!!! And I love the little dividers! I linked to your tutorial on Craft Gossip Sewing:
http://sewing.craftgossip.com/tutorial-loyalty-card-holder/2011/04/26/
--Anne
I am going to make this ASAP!!! This is something I have needed for years but never thought of it, great idea!!! Thanks!
lovely, perfect for a beginner like me!
Thanks for this pattern! I really needed this.
Christie...I'll say it again. You are an impeccable sewer!
I just made this. It's very cute! My sewing skills are not that great, so it was a little tricky to fit everything under the machine. The lines are super wonky, too. But I like it just the same! Maybe my second one will turn out better :)
Christie, Awesome tutorial. Made my first holder today and posted it along with links to your instructions at carmenhollywood.blogspot.com
Very easy to follow. Your pictures made the project super simple. Thanks for all your hard work!
Kisses,
Carmen
I just made the loyalty card holder for my daughter and it turned out super cute. Could you tell us what fabrics you used?
woooah ! I'm in love with this project ! This is sooo cute ! I have to make one for myself !
Thank you very much for sharing !
Featured you!
http://allawesomelinks.blogspot.com/2011/06/loyalty-card-holder-pattern.html
Because I am a sewing beginner, I really appreciate your tutorials with pictures. I made the card case too. pictures are at my blog. Thanks a lot!
http://uemurart.blogspot.com/2011/09/thread-case.html
I appreciate your hard work, this is really a great tutorial.
print loyalty card
All worthy stuff, thank you.
print loyalty card
That's definitely what he's representing with the information that you've given.cool and sound efforts thanks.
plastic card
scratch card printing
Great Tutorial - I made this 3 times now, any tips on how you stop the corners from bunching when turning from pouch to flap...I cant seem to get mine right
This is super awesome!
superbe merci
Print on holder is best and color full.
Plastic Card Printing
Plastic Card Printing
Such a nice card is presented here designer creativity is shown from the design thanks for sharing such a good idea.Free Business Cards
Love this...thanks!!!
I am trying to enter the Loyalty card given to me at the restaurant. I've entered the website the loyalty card says to enter, but I can't find the site on the web. Please advise.
Restaurant rewards
Thank you so much! i get discounts in Loyalty Cards and i am very happy to get this cards. Visit http://www.idsolutionsindia.com/loyalty-cards.html
Muito obrigada por ter ensinado essa bolsinha, moro no Brasil...
Please guys, help me. Can I use my loyalty card through this terminal in supermarket?
http://poscalifornia.com/
Thanks a lot for this pattern!
And I love the little dividers! I linked to your tutorial on my blog (so you can see the result): https://crissounnette.blogspot.fr/2018/04/en-attendant-le-troisieme-jorganise-mon.html
It's in french :)
I was able to save and print pattern B, but not pattern A. it just tells me that 'the file [i] have requested does not exist' help please!
I'm having the same problem Bethaney is having. It won't let me download pattern A, either...
Sorry, the file you have requested does not exist.
this is what I get for pattern A.
Can anyone post the pattern A?
Post a Comment